A fanned deck, a stack of glossy chips, a single ace catching the light, the imagery of cards and poker is endlessly photogenic, which is exactly why it shows up in everything from editorial features to social posts and brand campaigns. Yet shooting it well is harder than it looks. Glossy card surfaces throw harsh reflections, fine print demands sharp focus, and a flat snapshot fails to capture the drama these objects deserve. This guide covers how to shoot and edit striking playing card and poker photography, from controlling difficult light to the editing moves that make the suits pop.
For a moodier, neon-lit treatment of the same subject, it pairs naturally with our guide on how to edit photos for a glamorous Las Vegas casino aesthetic.
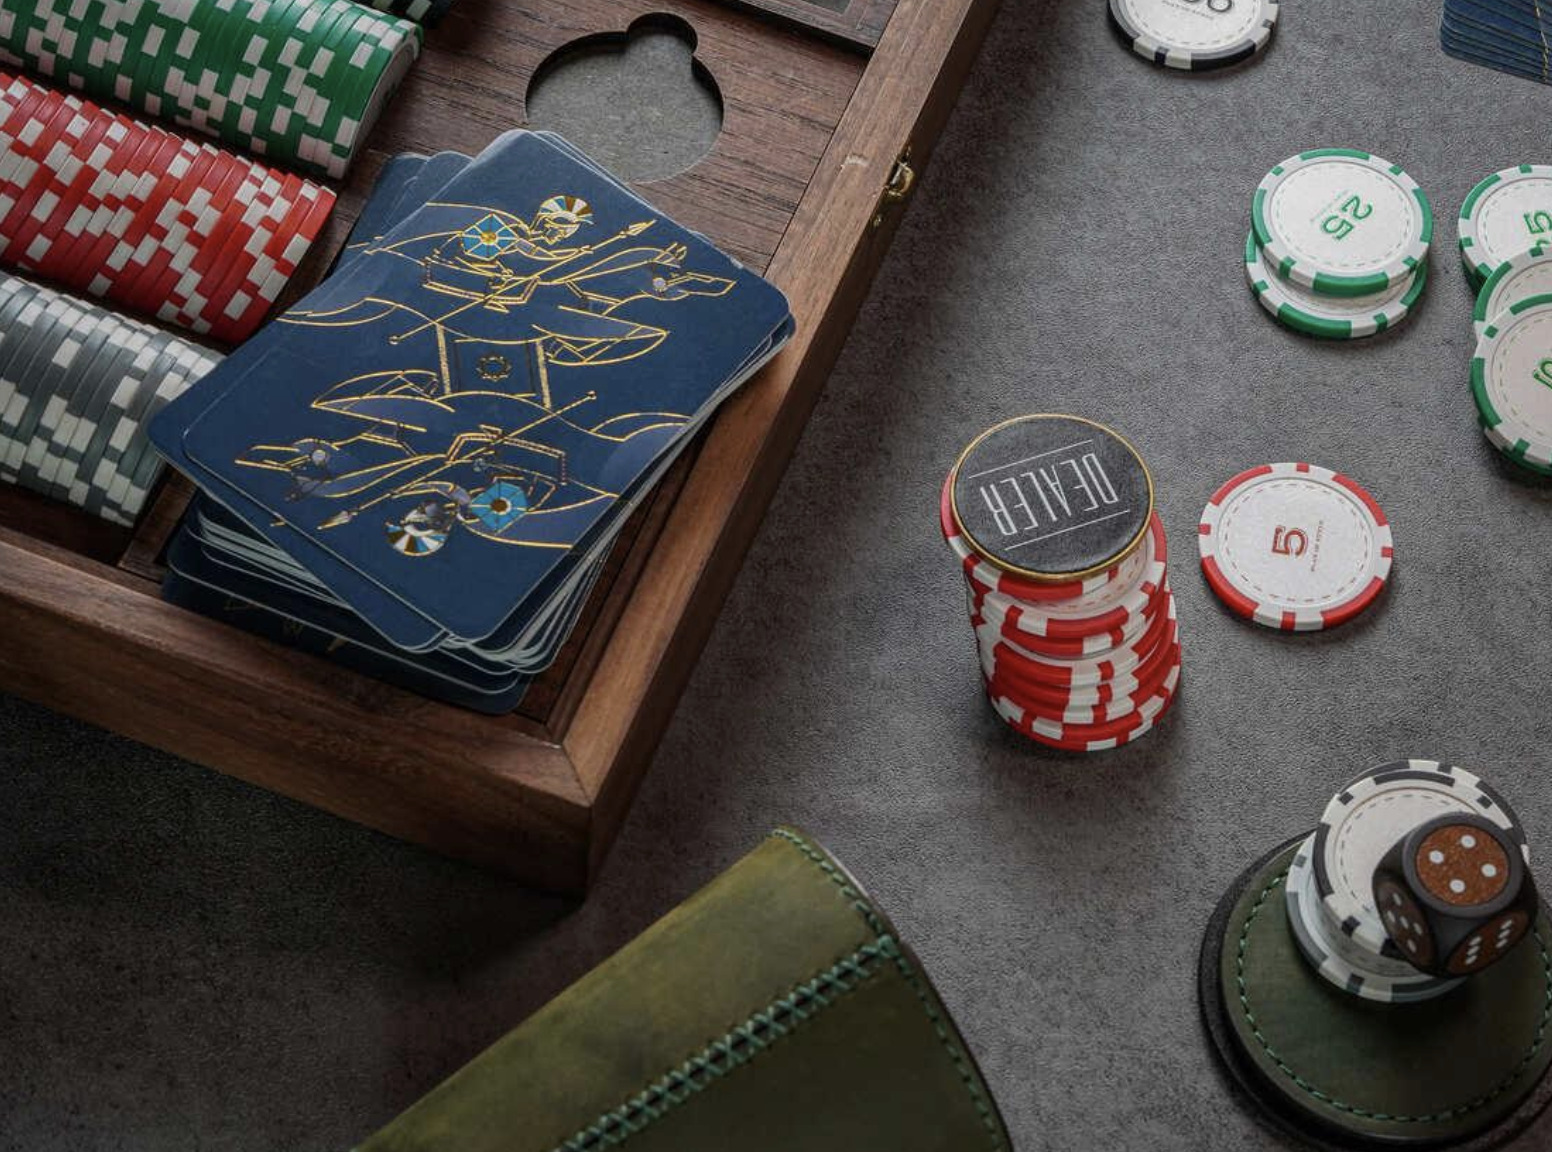
Setting up the shot
Card and chip photography is a form of still life and product photography, so a little control over your space goes a long way.
Pick a clean background. Dark surfaces, green baize, weathered wood or black velvet all add mood and make colours and edges stand out. Keep it simple so the cards remain the hero.
Stabilise the camera. A tripod lets you use low ISO and small apertures for maximum sharpness and depth, and frees you to arrange the scene precisely.
Shoot in RAW to retain the detail and colour latitude you will want when editing the deep reds and blacks of the suits.
Lighting glossy cards and chips
The defining challenge is reflection. Cards and chips are glossy, and direct light bounces straight back as distracting hotspots.
Soften your light. Use a diffused source, a softbox, a window with a sheer curtain, or even a white sheet over a lamp, so the light wraps gently rather than glaring.
Light from the side. Side lighting rakes across the surface to reveal texture, the emboss of the chips, the tooth of the card stock, and gives the scene three-dimensional depth.
Control reflections with angle. Move the light, the camera or the cards a few degrees at a time until the hotspots fall away. A simple black card held just out of frame can "subtract" unwanted reflections from shiny surfaces.
Add a touch of rim or accent light to separate a stack of chips from the background and give the image a polished, professional edge.
Composition and focus
Strong arrangement turns objects into a story.
Build a focal point. A winning hand, a lone ace, or a tall stack of chips gives the eye somewhere to land. Use the rest of the frame to support, not compete.
Play with classic arrangements. A clean fan of cards, an overlapping spread, a leaning tower of chips, or a flat overhead "knolling" layout each read instantly and photograph beautifully.
Use a wide aperture for drama, or stack for sharpness. A shallow depth of field with one card crisp and the rest melting into blur looks cinematic; when you need the whole arrangement sharp, use a smaller aperture or focus-stack several frames.
Get close. Macro detail, the print of an index, the texture of a chip's inlay, rewards the viewer and shows craftsmanship.
Editing for impact
Editing is where card photography gains its richness and punch.
Set black and white points for a crisp, high-contrast base, letting the blacks go genuinely deep.
Make the suits pop by selectively boosting the saturation and luminance of reds, and deepening the blacks of the spades and clubs, using HSL controls.
Dodge and burn to sculpt the scene, brightening your focal card and gently darkening the edges to guide the eye.
Add clarity or texture carefully on the cards and chips to emphasise detail, while keeping any background smooth.
Finish with a subtle vignette to frame the arrangement and concentrate attention on the hero of the shot.
Putting it all together
Great playing card and poker photography comes down to three things: tame the reflections with soft, side-angled light; compose around a clear focal point; and edit for deep contrast with punchy, selective colour. Master those, and a simple deck of cards becomes a dramatic, gallery-worthy image.
Frequently asked questions
How do you avoid reflections when photographing glossy cards and chips? Use a soft, diffused light source rather than direct light, position it to the side, and adjust the angle of the light, camera or cards a few degrees at a time until hotspots disappear. A black card held just out of frame can subtract unwanted reflections from shiny surfaces.
What is the best lighting for poker and card photography? Soft, directional side lighting works best. It reveals the texture and emboss of cards and chips, creates depth, and is easy to control for reflections. A small rim or accent light helps separate stacks of chips from the background.
How do you make the card suits stand out in editing? Set deep black and white points for contrast, then use HSL controls to boost the saturation and luminance of the reds while deepening the blacks of the spades and clubs. Dodging the focal card and adding a subtle vignette further draws the eye.
Do you need a macro lens for card photography? It helps for extreme close-ups of fine detail like card indexes and chip inlays, but it is not essential. A standard lens with a tripod, a small aperture and careful focus, or focus stacking, can produce sharp, detailed results.